Create Mining Masternodes in Ubuntu (Linux) with Matrix AI Network

Here is a complete technical guide to running multiple Mining Masternodes on the same machine.
It is recommended to have a machine with at least:
8-core CPU (or more)
16 GB of RAM (or more)
Approximately 500 GB of disk space per Masternode (anticipating large storage space as it keeps increasing with time)
At least 1MB/s internet bandwidth per MasterNode
Key points:
To launch a Mining Masternode, you must stake at least 10,000 MAN.
To launch a Validation Masternode (used for pools), you must stake at least 100,000 MAN.
Each Masternode must have 2 Wallets A and B associated with it (which you will therefore need to create).
Wallet B will be configured on the machine and will serve as a secure bridge to wallet A where your staking will be located and where you will also receive your MAN rewards.
There are two types of rewards generated:
- Staking rewards
- Mining rewards
Both types of rewards will be sent to Wallet A of each node.
However the staking rewards will remain locked as long as the staking is also locked, while mining rewards will be available and transferable at all times.
Synchronizations with the blockchain are particularly long.
We will use a file called “snapshot” so that we don’t have to synchronize everything from scratch.
Steps to synchronize a first Masternode
1. Download the latest snapshot, at the time of this article, it is this one, taken at block 5,900,000: https://www.matrix.io/../assets/dropdown/TrieData5900000.tgz
2. Then extract the archive (no matter where at the moment) to have the uncompssed file (TrieData5900000).
3. Create a folder “Masternodes” which will contain a subfolder for each masternode.
In this guide we will use mining masternodes as example (most common), so we will name the subfolders “MiningNode1”, “MiningNode2”, “ MiningNode3 ”, etc
4. Go to the “MiningNode1” folder.
Right click, Open Terminal here.
5. In the Terminal, run the following command which will download Go-Matrix in a “masternode” folder:
git clone https://github.com/MatrixAINetwork/go-matrix.git masternode
6. Then the command to enter this folder:
cd masternode
7. Then the command to download the Gman script:
wget https://github.com/MatrixAINetwork/GMAN_CLIENT/raw/master/MAINNET/20200520/linux/gman
8. Then modify the permissions on the gman file and create a “chaindata” folder and “keystore” sub-folder in chaindata with the following command:
chmod 775 gman && mkdir chaindata && mkdir chaindata/keystore
9. Then you have to move man.json into chaindata and copy the picstore folder to paste it into chaindata:
mv man.json chaindata && cp -R picstore chaindata /
10. Now (if you haven’t already done so), you need to create your Wallet B1 by going to https://wallet.matrix.io/ with Keystore mode.
Write down your B1 password and save your B1 Keystore file.
Note: It is pferable to use an unusual password for this wallet, even if it is weak. This password will be stored in clear in a config file, so it is potentially hackable (which is not dangerous in itself), it is just better if it does not give any clue about your other secure passwords.
11. Now you have to create a new text document (use the method of your choice), still in the “masternode” sub-folder of the “MiningNode1” folder.
12. Rename this text document to signAccount.json
Then edit this file with a text editor.
13. Copy / paste the following content into the text editor:
[ {
“walletaddress”:””,
“walletpassword”:””
} ]
And replace walletaddress with the address of your Wallet B1, and walletpassword with the password of your Wallet B1.
Then save the changes.
14. You must now place your Wallet B1 KeyStore file (downloaded in step 10) in the masternode/chaindata/keystore/ folder.
15. Then place the snapshot file extracted in step 2 in the masternode/snapdir/ folder (create the folder if it does not exist).
16. Then return to the Terminal (whose current path should still be […]/Masternodes/MiningNode1/masternode/) and run the following command:
./gman -datadir chaindata init MANGenesis.json && ./gman -datadir ./chaindata aes -aesin ./signAccount.json -aesout entrust.json
17. If all goes well, you should be asked for a password, this will be the password to type to launch the masternode, enter the password of your choice.
18. When launching the node for the first time, you must indicate in the command parameters to use the snapshot file, this will then no longer be necessary if you have to restart the node later.
Use the command:
./gman --datadir ./chaindata --networkid 1 --debug --verbosity 3 --port 5101 --manAddress MANADDRESS --entrust ./entrust.json --gcmode archive --outputinfo 1 --syncmode full --loadsnapfile "TrieData5900000"
There are 3 parameters to check:
- MANADDRESS must be replaced by the address of Wallet B1
- The port number (after “port”) must be available (open in your router and not already used by another process)
- “TrieData5900000” must correspond to the name of the snapshot file contained in the “snapdir” folder
19. To launch a node again afterwards (without the snapshot), use the command:
./gman --datadir ./chaindata --networkid 1 --debug --verbosity 3 --port 5101 --manAddress MANADDRESS --entrust ./entrust.json --gcmode archive --outputinfo 1 --syncmode full
20. You should be asked for the masternode password (chosen in step 17), then the node should launch and start synchronizing.
21. Wait until for full synchronization with the blockchain.
You can check the progress of the synchronization by opening a new Terminal from the MiningNode1/masternode/ folder and running the command:
./gman attach ./chaindata/gman.ipc
22. This opened the IPC (the Command Line Interface of the miner), then type the command:
man.syncing
23. The result will give you a value of “Current block” which is the block where your node currently is, and a value of “Highest block” which is the latest current block of the blackchain.
When the 2 values are identical, your node is then synchronized.
If man.syncing returns “false”, check the “Check the status and operation of a MasterNode” section down below.
Steps for other masternodes
(Assuming that the first one is 100% synchronized, which allows to do the sync only once and then re-use it, rather than waiting for the sync for each node)
1. In your Masternodes root folder (with an “s”, which should contain the MiningNode1 folder), create a “MiningNode2” folder.
2. Repeat the same steps as for the first node from step 4 (from the MiningNode2 folder this time of course) up to step 17, avoiding step 15 (which put the snapshot file, at worst if you do it doesn’t matter it won’t change anything).
You will have to create a new Wallet B2 (instead of B1), and replace everything relating to Wallet B1 by Wallet B2 of course.
3. Stop Mining Masternode 1 by going to its Terminal window and pssing CTRL + C.
4. Go back to Terminal 2 (whose current folder should now be […]/Masternodes/MiningNode2/masternode/), and run the following command to copy the synschornized data from the node 1 blockchain to a backup folder:
mkdir ../../snapchain && rsync -a --progress ../../MiningNode1/masternode/chaindata/gman ../../snapchain
5. Once the copy is complete, relaunch Mining Masternode 1, by going back to Terminal 1 and re-issuing the following command (replace MANADDRESS by the address of wallet B1):
./gman --datadir ./chaindata --networkid 1 --debug --verbosity 3 --port 5101 --manAddress MANADDRESS --entrust ./entrust.json --gcmode archive --outputinfo 1 --syncmode full
6. We can now copy the synchronized blockchain data to our MiningNode 2 with the following command:
rsync -a --progress ../../snapchain/gman chaindata/gman
7. Once the copy is complete, we can launch our Mining Node 2:
./gman --datadir ./chaindata --networkid 1 --debug --verbosity 3 --port 5102 --manAddress MANADDRESS --entrust ./entrust.json --gcmode archive --outputinfo 1 --syncmode full
⚠️ Check the 2 parameters
carefully :
- MANADDRESS to be replaced by the address of your Wallet B2
- Port number (after “port”) which must be different for each node
8. You can check the sync status as in step 21 and 22 from the first node.
9. Repeat these steps for each node, replacing MiningNode2 by MiningNode3 (then 4, 5, etc.) as well as Wallet B2 by Wallet B3 (B4, B5, etc.), and without steps 3 and 5 which are no longer necessary since the copy of the blockchain data was made in a separate folder.
Check the status and operation of a MasterNode
1. Go to the Terminal corresponding to the MasterNode to check, let’s say Terminal 3 for MasterNode 3.
2. pss CTRL + SHIFT + T to open a new tab in the same Terminal which will be in the same current folder as the first tab.
3. Run the following command which will open the IPC, the Matrix miner command interface:
./gman attach ./chaindata/gman.ipc
4. To check the synchronization status with the blockchain, use the following command:
man.syncing
If the node is fully synchronized with the Blockchain, it will return “false”.
If the node is not actively being synchronized, it will return “false”.
Otherwise it returns several informations such as “currentBlock” and “highestBlock” which correspond respectively to the number of the current block of the Node and the current number of the blockchain. When the 2 match, the node is fully synchronized with the blockchain.
5. If man.syncing returns “false” and you want to check if your node is well synchronized (which is recommended), use the following command to find out the current block number of your node:
man.blockNumber
And compare the result with the current blockchain number on https://tom.matrix.io (see Block Height, top left)
6. The number of peers connected to the node is also an indicator of the good functioning of the node, it is possible to check this value with the command
admin.peers
50+ peers (approximately) testifies to a good available internet bandwidth and a node that runs well.
Manage your nodes server remotely
The easiest, free and secure way is to use TeamViewer software.
1. Visit their official site from the node server under Ubuntu: https://www.teamviewer.com
2. Download and install TeamViewer on Ubuntu
3. Go to the options from the Extras → Options menu, then check “Start TeamViewer with Ubuntu” or similar (the screenshot is an example with Windows)

4. By default TeamViewer changes password on reboot, to avoid this we will link this machine with your TeamViewer account.
If you don’t already have a TeamViewer account, use this link to create one: https://login.teamviewer.com/LogOn/PopUp/create-account
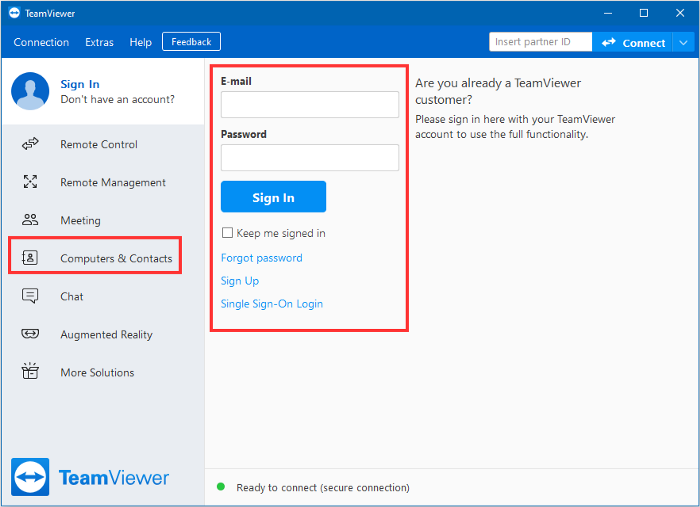
5. Log in to your TeamViewer account from the interface:

6. Go back to the options via the Extras → Options menu, and in the “Security” tab, check the “Grant easy access” box:

There may be a “configure” button to link your account before you can check the box.
7. Check that everything is working well, restart your Ubuntu machine and check that TeamViewer starts up on startup without any action on your part.
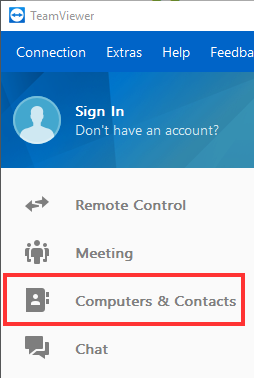
Then take another device with TeamViewer, connect to your TeamViewer account, and watch in the “Computer and Contacts” tab that your node server appears.

⚠️ For this to work properly, your node server under Ubuntu must (I think) be in autologin mode at startup, i.e. your session opens automatically at startup without entering your password.
You can now connect to your nodes server with TeamViewer from anywhere, restart it remotely if necessary, and then reconnect to it.
Query your node through its API
For developpers and more complex configurations, the API documentation of a Masternode is available here:
https://dev.matrix.io/api/RPC.html
Last updated